2-Ingredient Biscoff Mousse Recipe
Introduction
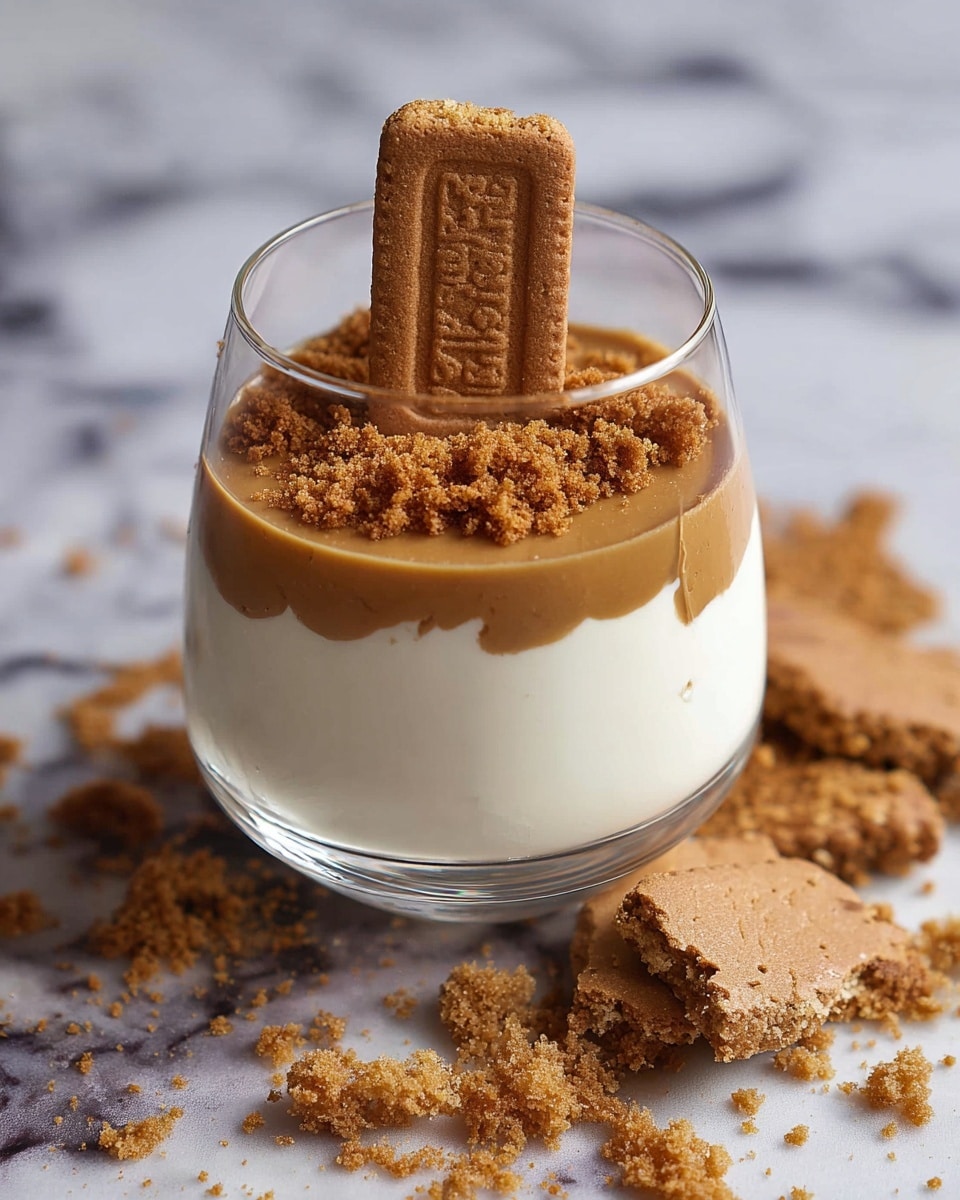
This 2-Ingredient Biscoff Mousse is a delightfully creamy and simple dessert that combines the rich flavor of Biscoff spread with fluffy whipped cream. It’s quick to make and perfect for satisfying your sweet tooth with minimal effort.
Ingredients
- 2 cups heavy cream
- 1 cup Biscoff spread, plus more for topping
- Optional: Biscoff cookies for garnish
Instructions
- Step 1: In a large bowl, whip the heavy cream and Biscoff spread together using a hand mixer or stand mixer until the mixture is smooth and medium peaks form. Be careful not to overbeat to prevent separation.
- Step 2: Transfer the mousse to a large bowl or divide it into individual serving containers. Chill in the refrigerator for about 30 minutes or until cool.
- Step 3: Before serving, top with extra Biscoff spread and garnish with Biscoff cookies if desired. Serve immediately and enjoy!
Tips & Variations
- For a lighter texture, fold in a little powdered sugar before whipping.
- Try adding a pinch of cinnamon or a splash of vanilla extract for extra flavor.
- Use vegan whipped cream and a plant-based Biscoff spread alternative to make this dessert dairy-free.
Storage
Store any leftover mousse in an airtight container in the refrigerator for up to 2 days. Before serving again, give it a gentle stir and chill if needed. This mousse is best enjoyed fresh and does not freeze well.
How to Serve
Serve this delicious recipe with your favorite sides.
FAQs
Can I make this mousse ahead of time?
Yes, you can prepare the mousse a few hours in advance and keep it chilled until serving. However, it’s best consumed within 2 days for optimal texture and flavor.
What should I do if the mousse starts to separate?
This usually happens if the mixture is overwhipped. To fix it, try gently folding the mixture to bring it back together, but if it’s too far separated, start over with fresh ingredients.
Print2-Ingredient Biscoff Mousse Recipe

This luscious 2-Ingredient Biscoff Mousse is a simple and indulgent dessert combining the creamy richness of heavy cream with the unique caramelized flavor of Biscoff spread. Perfect for a quick treat, it whips up effortlessly and can be garnished with extra Biscoff spread and cookies for an added crunch and presentation flair.
- Prep Time: 10 minutes
- Cook Time: 0 minutes
- Total Time: 40 minutes
- Yield: About 4 servings 1x
- Category: Dessert
- Method: Blending
- Cuisine: American
- Diet: Vegetarian
Ingredients
Primary Ingredients
- 2 cups heavy cream
- 1 cup Biscoff spread (plus extra for topping)
Optional Garnish
- Biscoff cookies for garnish
Instructions
- Whip Ingredients: In a large bowl, combine the heavy cream and Biscoff spread. Using a hand mixer or stand mixer, whip the mixture until smooth and medium peaks form. Be careful not to overbeat, as it might cause the mixture to separate.
- Transfer Mousse: Once whipped, transfer the mousse into a large serving bowl or divide it into individual containers for serving.
- Chill Mousse: Place the mousse in the refrigerator and chill for at least 30 minutes or until it is cool and set.
- Add Toppings: Before serving, top the mousse with extra Biscoff spread and garnish with Biscoff cookies if desired for additional texture and flavor.
- Serve and Enjoy: Serve the mousse immediately after topping to enjoy its creamy texture and delightful flavor.
Notes
- Do not overbeat the mixture to prevent it from splitting.
- Chilling the mousse helps it set better and improves texture.
- Use full-fat heavy cream for best results and richer flavor.
- Can be served in individual cups for an elegant presentation.
- Store leftovers covered in the refrigerator and consume within 2 days.
Keywords: Biscoff mousse, easy dessert, no bake mousse, 2-ingredient dessert, whipped Biscoff cream